Simple CNN#
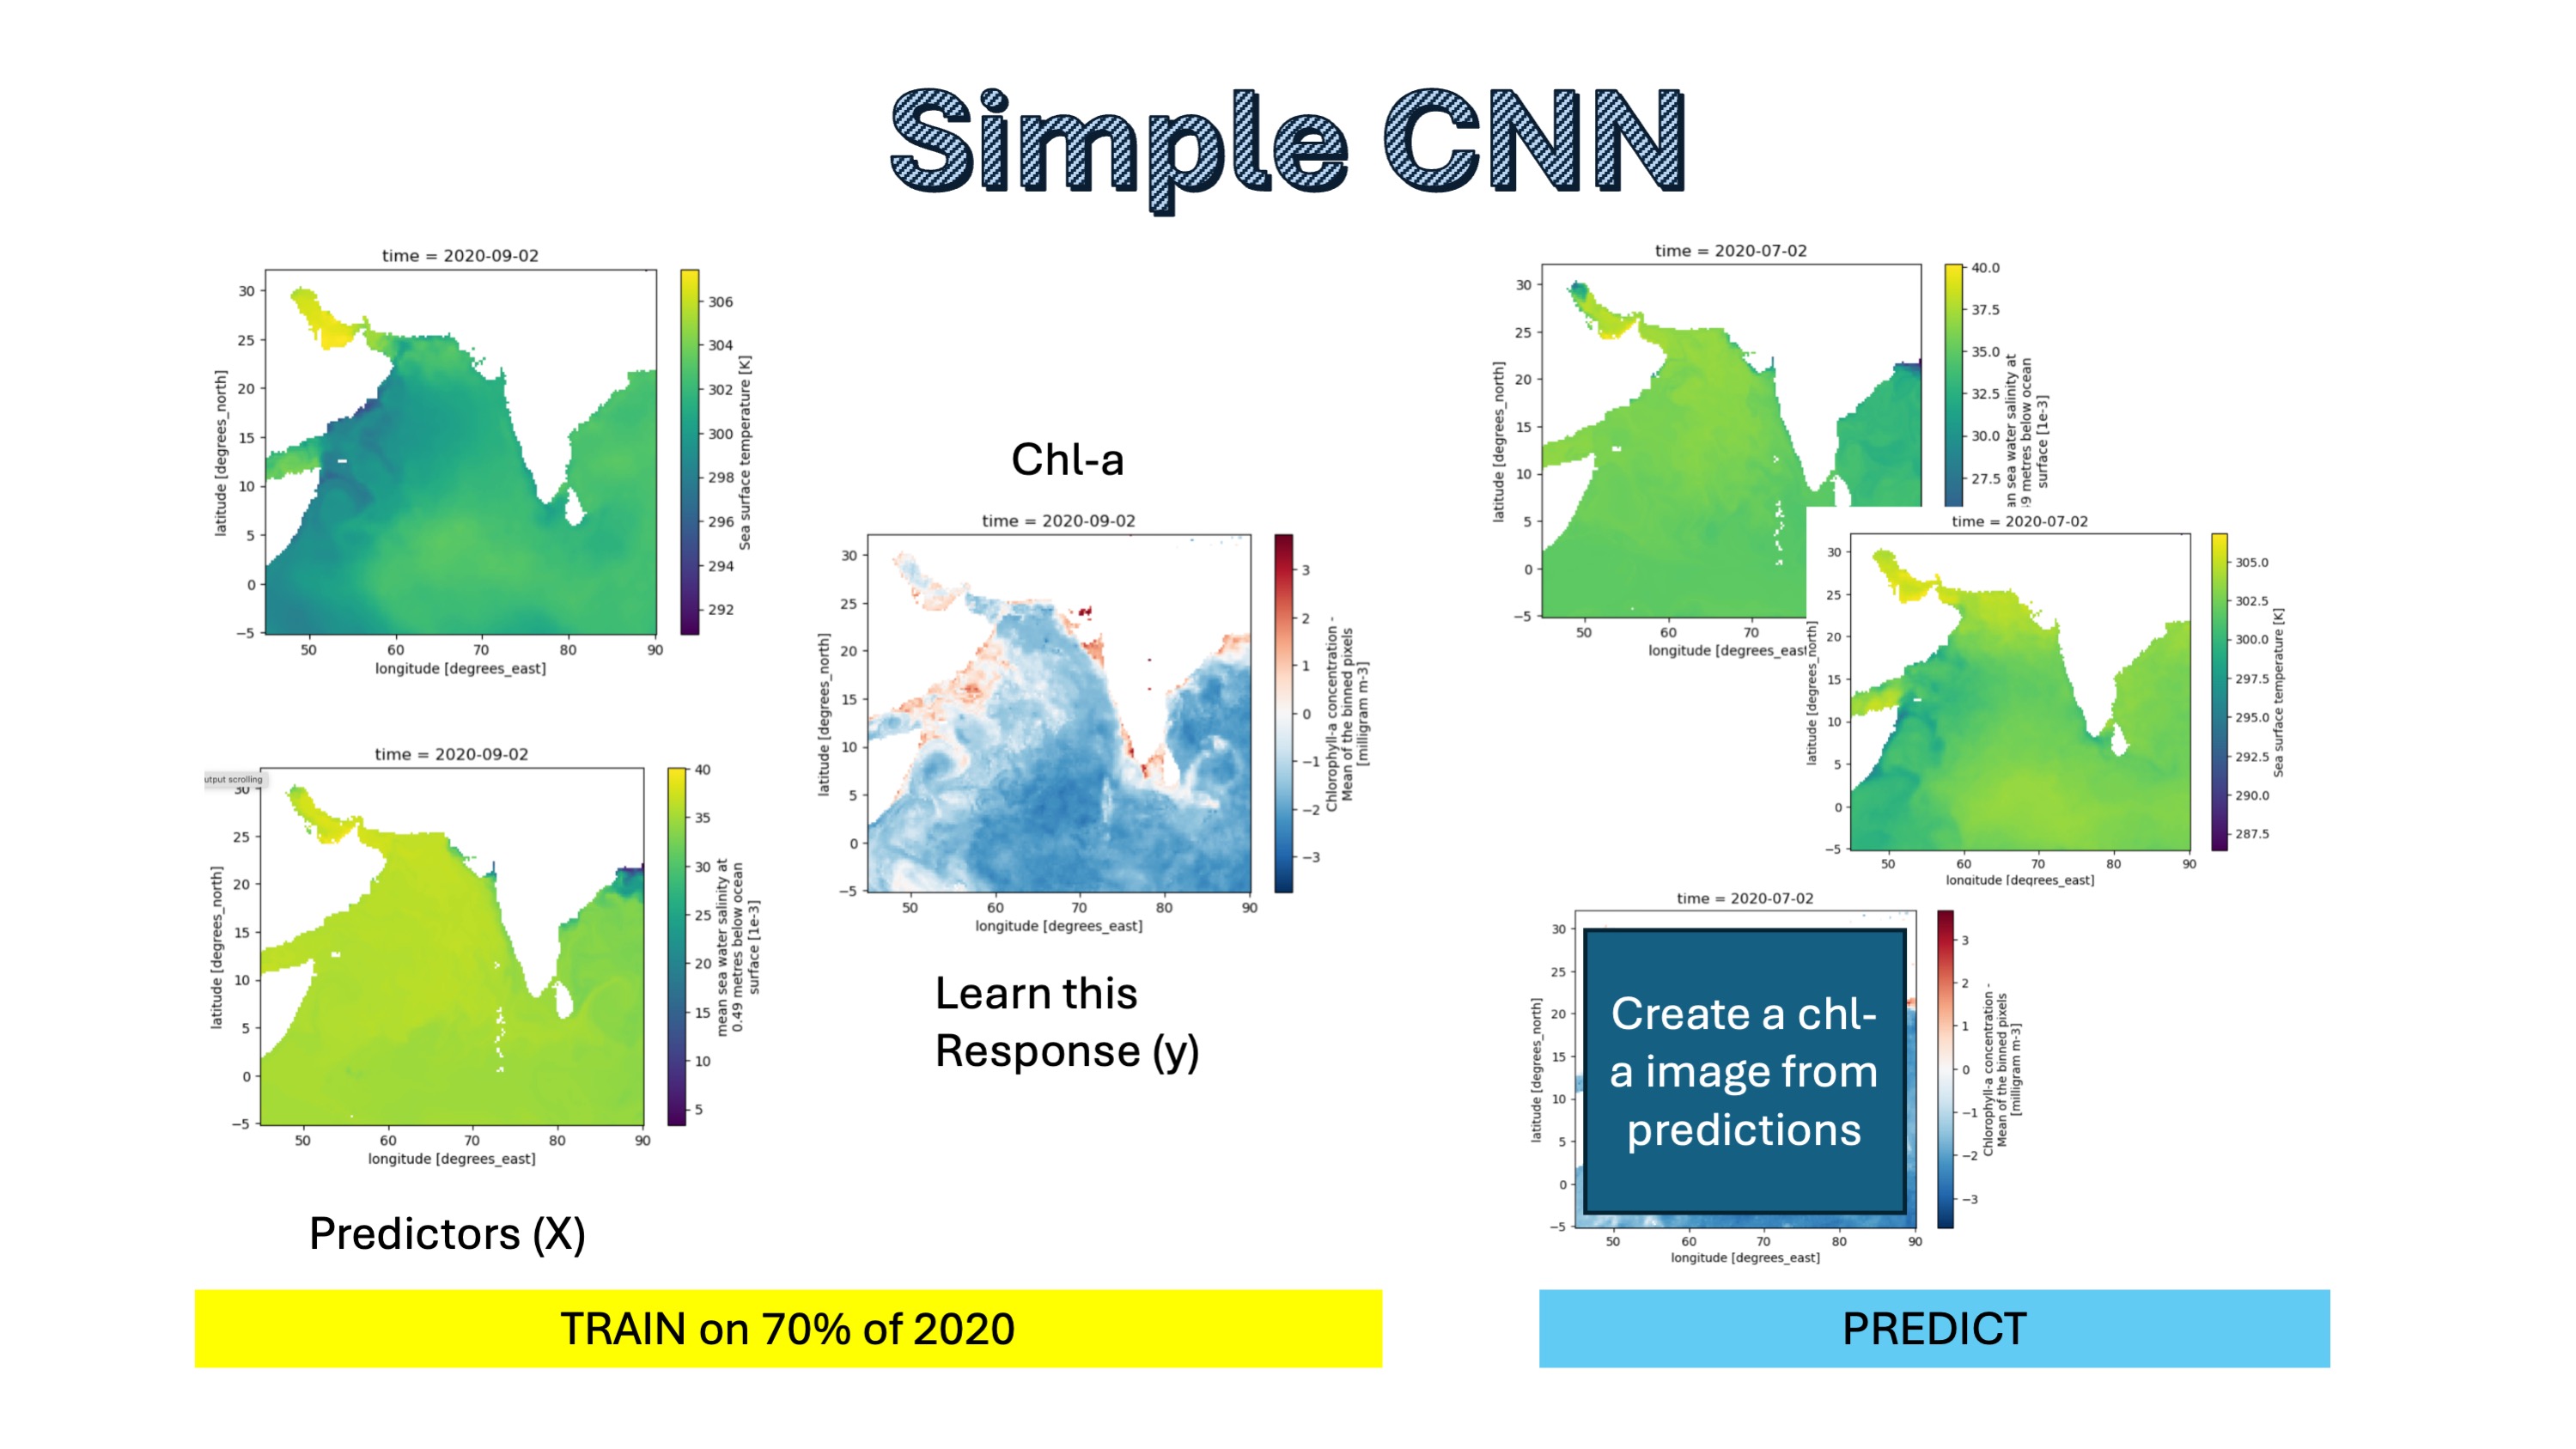
In this example, we will attempt to use a Convolutional Neural Network trained on sea surface temperature (sst) and salinity to predict Chlorophyl-a. This is a toy example and won’t work very well since sst and salinity do not predict chlorphyll-a all that well. But it will show you the steps involved: prep data into xarray objects used for training, validation and testing.
Get the tutorial#
You can work in this as long a you don’t save. Or make a copy.
Part I:
~/shared/cnn/CHL_prediction_CNN.ipynb
Open a terminal
cp ~/shared/cnn/CHL_prediction_CNN.ipynb ~
Prepping the data#
There are many data formats you could use, but we are going to use xarrays (a type of data cube). Technically, it is a numpy array with some meta data. Our arrays with have a bounding box (lat/lon), a time dimension, and variables.
We want to create an xarray for the training, validation, and test data:
X_train, X_val, X_test: the predictor variables of the train/validation/test datay_train, y_val, y_test: the response variables of the train/validation/test data
All the xarrays will have the same lat/lon grid. The _train sets will have the same days, the _val will have the same days, and the _test will have the same days.
Modeling fitting, validation and testing#
Once we have the data in the right form, we pass our model fitting function the training data sets X_train (predictors) and y_train (response or what we are trying to learn). During training, we learn the parameters.
During the validation step, we will run a loop to improve our hyperparameters (structure of our model) using the X_val and y_val that were not used in training. The result is our ‘best’ model.
Finally, during the test step, we use our best model to make predictions for the days that it has never ‘seen’ (the test data). It will use the predictors for these test days (X_test) to make predictions and then we will compare the predictions to the true values (y_test).
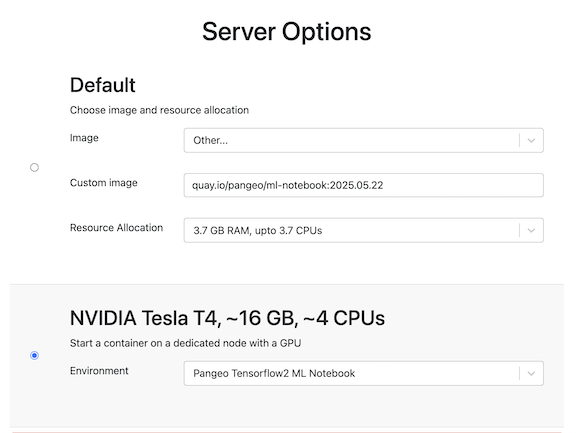
Set-up on the JupyterHub#
Although you can run this tutorial on CPU, it will be much faster on GPU. We used the image quay.io/pangeo/ml-notebook:2025.05.22 for running the notebook. If you are using CPU, then use Other with the image link about and choose 3.7Gb. If you are using GPU, just select the NVIDIA radio button.